Blog
EV Charging App: Your Guide to Easy Charging
July 28, 2026
Post Author
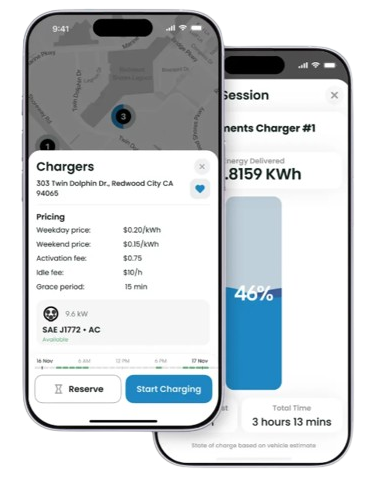
A new and improved EVmatch EV charging app has arrived, with a redesigned interface, real-time charger availability, live charging status, better navigation, and Spanish language support. EV charging demand is increasing across multi-family housing, which means residents need a reliable EV charging app to make EV ownership accessible and easy.
This guide is designed to walk you through the new app, from setting up your payment method to plugging in and tracking your history afterward.
How to Use the EVmatch App: A Simple 6-Step Guide for Apartment Dwellers & More
Step 1: Set Up Payment and Purchase Charging Credit
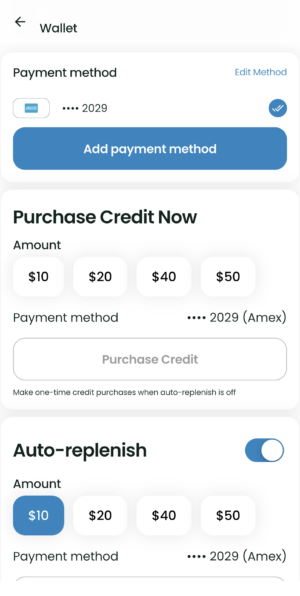
Unless you have been lucky enough to find a free charger, most chargers have an energy-based price. The EVmatch EV charging app simplifies your experience with one-time payment setup. Click Add payment method to add your credit card or bank account information, select the amount of credit you would like to purchase, and click Purchase Credit.
To automate future payments so your account always has sufficient credit, turn on Auto-replenish and select the amount you want replenished to your account when your balance drops below $5 or is insufficient to meet a reservation hold price.
Step 2: Enable Notifications in the EVmatch App
The EVmatch app provides notifications about reservations, active charging sessions, idle fees, and session receipts in two forms:
- Push notifications that appear as banners on your mobile device
- Email notifications sent to the email address associated with your EVmatch app account
Please be sure that push notifications are enabled on the Notifications page so you receive time-sensitive details about your reservations and charging sessions. You cannot disable email notifications from within the app, but you can filter them out of your email inbox.
Step 3: Find Chargers in the EVmatch EV Charging App
You can pull up a charger in the EVmatch EV charging app in a few different ways. If the charger is new to you and it is right by you, we recommend scanning the QR code attached to the front of the charger with your mobile device. The app has a built-in QR code scanner at the bottom of the Map page so there is no need to open a separate app.
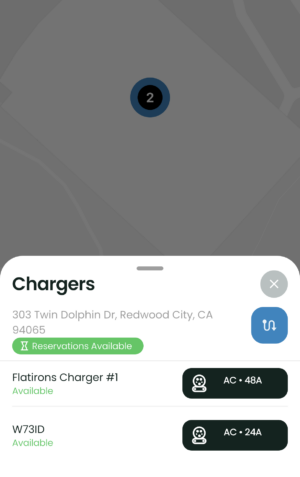
If you aren’t standing in front of the charger, open the Map and use geo-location or enter an address to find a specific location. If the chargers are publicly available or you have entered the access pin code, a map indicator will appear with a number inside representing the quantity of chargers at the location. A blue icon indicates at least one charger at the location is available for use.
Tap the indicator to pull up the list of chargers and their statuses and select a charger to use. From the chargers list view, you can:
- See if the charger can be reserved
- Open navigation directions to the location from within Apple or Google Maps.
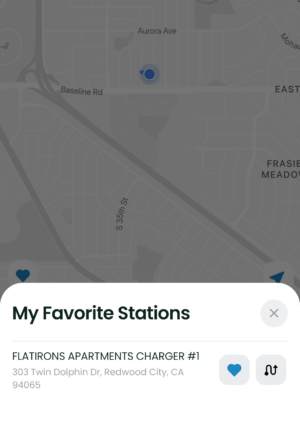
If you are a repeat user of a charger, use the favorites feature represented by the heart icon throughout the app to simplify your charging process.
Open the Map page and click the blue heart icon on the bottom left side of the screen to open your list of favorite chargers.
To favorite a charger, click the white heart icon on the charger page (the heart will turn blue and remain on the favorites page until you remove it).
From the favorites popup, you can select a charger and unfavorite it by tapping the blue heart icon, or navigate to the location.
Step 4: Make A Reservation and Start Charging with the EVmatch App
Range anxiety is eliminated with the EVmatch reservations feature. Use reservations to book a specific charging window that fits your schedule.
Start by opening a charger in the app (refer to Step 3 in the previous section) and selecting Reserve. The Charge Now feature nestled next to the Reserve button on the charger page allows you to make a reservation on the spot to start charging quickly.
Once on the Reservations page, review your booking window and duration. If you need to make adjustments, click Change Time to update the booking start time and duration. Note that the default session duration is four hours.
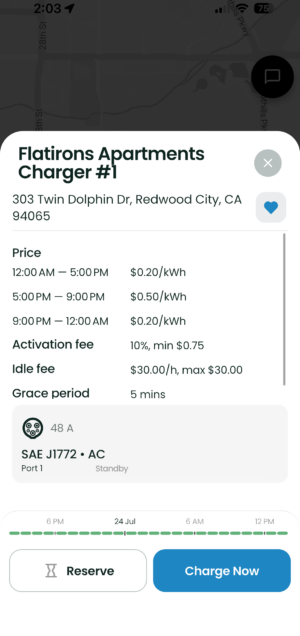
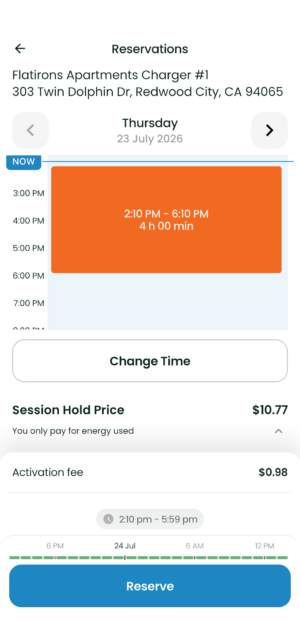
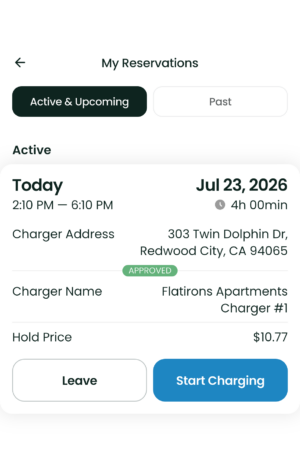
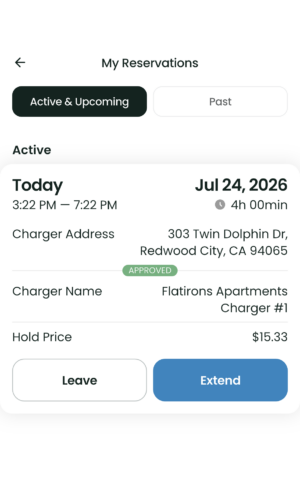
After booking your reservations, you will be directed to My Reservations within the EV charging app where you can change or cancel your booking prior to the start of your reservation.
When your reservation window arrives, navigate to My Reservations and use the Start Charging button to activate the charger.
IMPORTANT: Plug in your vehicle before clicking the Start Charging button.
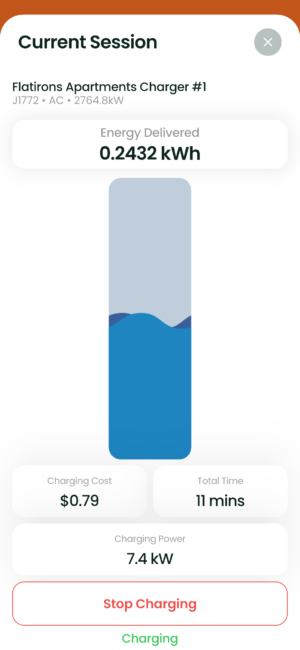
After activating the charger, a new window will appear in the app called Current Session with information about your charging session, including total energy delivered, real-time charging cost, total plugged-in time, and charging power in kW.
There is also an option to stop the charger with the Stop Charging button. This button does not end your reservation, but it will stop the flow of electricity. If you want to end your reservation, navigate to My Reservations and click Leave.
Extend or End Reservations
At any time during your booking, you may change the duration of your reservation by clicking the Extend button on My Reservations.
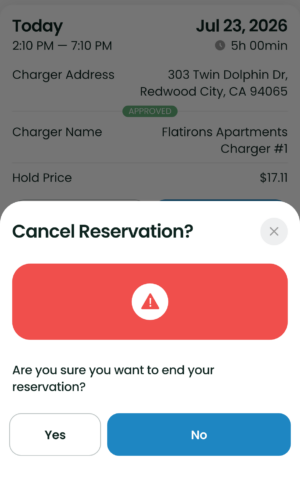
Additionally, you can end your reservation early by clicking the Leave button. A confirmation popup will appear. If you click Yes, the charger will stop dispensing electricity and the end time of your booking will update to that moment in time, allowing others to book the charger.
Start Charging when Reservations are Disabled
Some chargers in the EVmatch app cannot be reserved because the site host disabled the reservations feature.
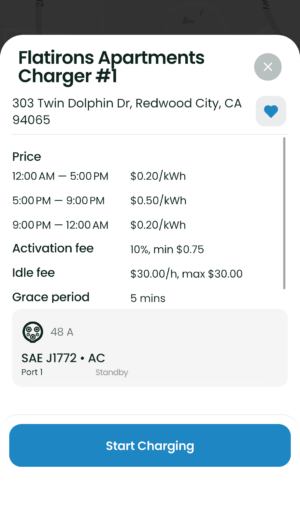
The user experience is straightforward for these chargers. Simply plug in your vehicle, open the charger in the app, and click Start Charging.
If successful, you will see an authorization page appear, followed by the Current Session page.
Step 5: Review your Charging, Reservation, and Payment Histories in the EVmatch EV Charging App
EV Charging History
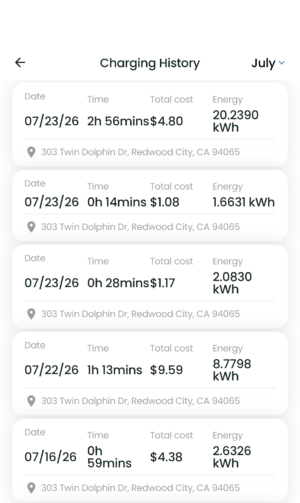
Find the history of all of your charging sessions on the Charging History page. From there, you will see a snapshot of all of your charging sessions by month. Use the toggle in the upper right-hand corner to review different months.
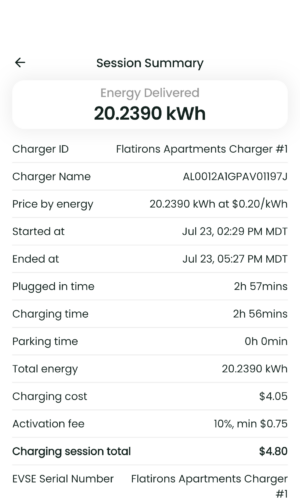
Click on individual sessions to view more details, including energy price, charging time, idle parking time, total energy, and a cost breakdown.
EV Charging Reservation History in the EVmatch EV Charging App
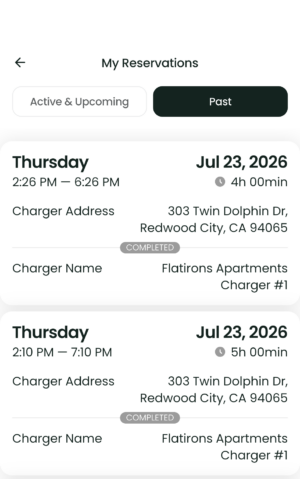
The My Reservations page is broken down into two sections:
- Active & Upcoming reservations. Review important information about upcoming reservations, including start time, booking window, and charger address and name.
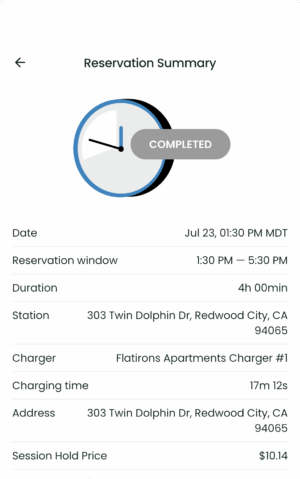
- Past reservations. Click an individual reservation in the Past section to view a summary, including the reservation duration, total active charging time, and session hold price.
EV Charging Payment History in the EVmatch EV Charging App
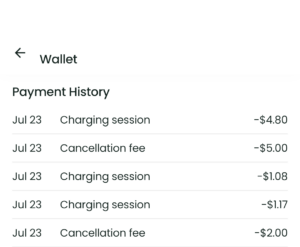
At the bottom of the Wallet page, you have a snapshot of your most recent payments that were deducted from your charging credit balance. Click View More to expand the list of payments.
Depending on the number of transactions you have completed, you may need to click View More multiple times to see all of the payments completed in the EV charging app.
Step 6: Customer Support and Questions about the EVmatch EV Charging App
Chat with Us in the EV Charging App
The EVmatch EV charging app is equipped with a chat widget that allows you to engage real customer support agents for help. Simply click the black bubble icon in the upper right-hand corner of the Map page to review old messages or start new messages. You can also access the chat tool by clicking My Profile > Customer Support.
Review FAQs or Email Us
We also provide an FAQ section in the app under My Profile with answers about using and hosting EVmatch chargers at multi-family properties, including apartments and condominiums, and chargers located at businesses, workplaces, destinations, and vacation rentals. Read the EV Charging FAQs on web as well.
You can always reach us at [email protected] if you need further support.
Post Author

DOWNLOAD
EVMATCH APP
RESOURCES
FOLLOW US